简体中文
简体中文
PRODUCTS
SL-GW40 TUYA GSM & WiFi Alarm System
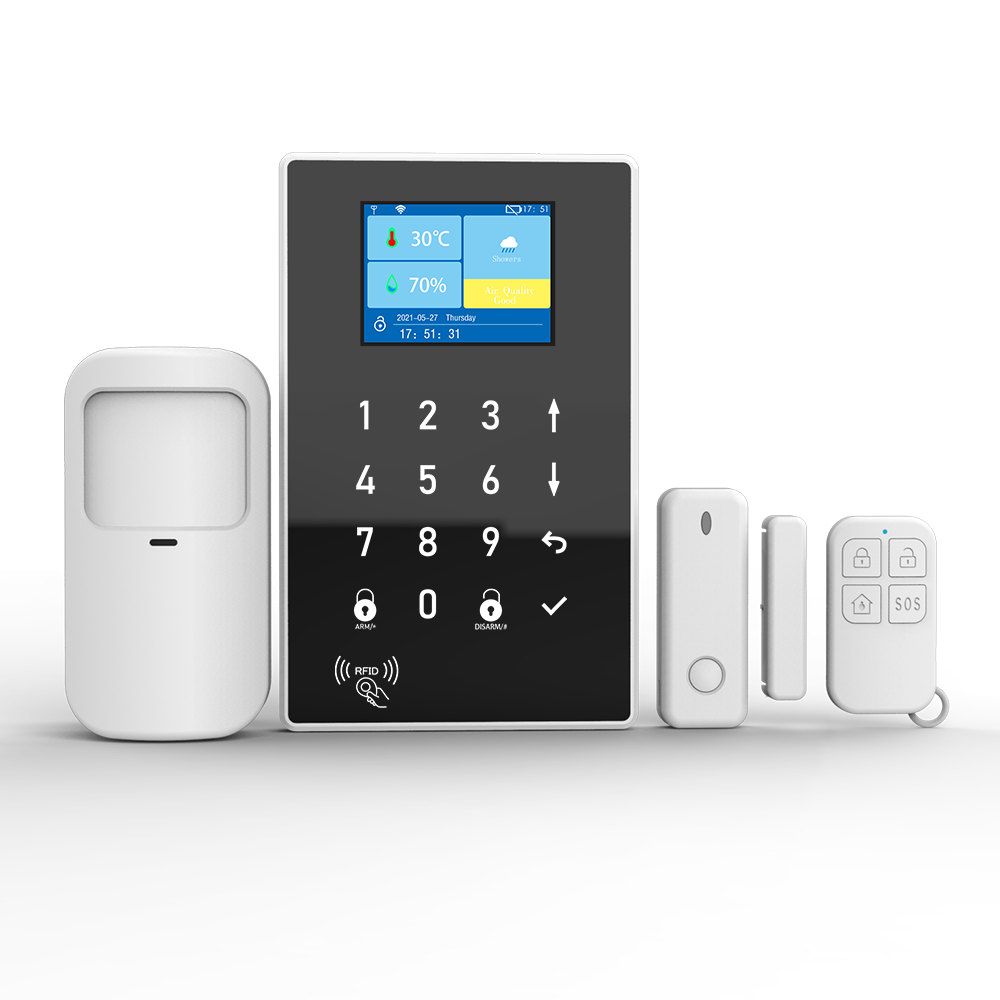
All sensors are wirelessly connected to the panel. The panel is always watching the sensors in your home to see if something is wrong.
- Commodity name: SL-GW40 TUYA GSM & WiFi Alarm System
- Product Details
-
Product Description
ABOUT YOUR ALARM SYSTEM
This is your security alarm system gsm. All sensors are wirelessly connected to the panel. The panel is always watching the sensors in your home to see if something is wrong. If one of the sensors reports
that something is wrong while the system is armed, the panel begins sounding, and an alarm text notification is sent and an alarm call is made to all registered users.
IN THE BOX
Alarm Panel x1
Door/Window Sensor x1
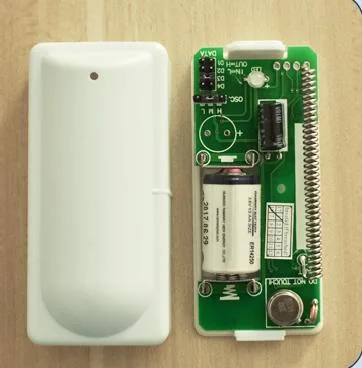
Motion Sensor x1
USB Cable x1
End of Line Resistors(EOLR) for Hardwired Zones x3
EOLR Hardwired Zones Connections x1
User Guide x1
Optional.
Power Adapter Remote Tag
RFID Tag
Wireless Siren Wireless Keypad
Doorbell Button
SPECIFICATIONS
Alarm Panel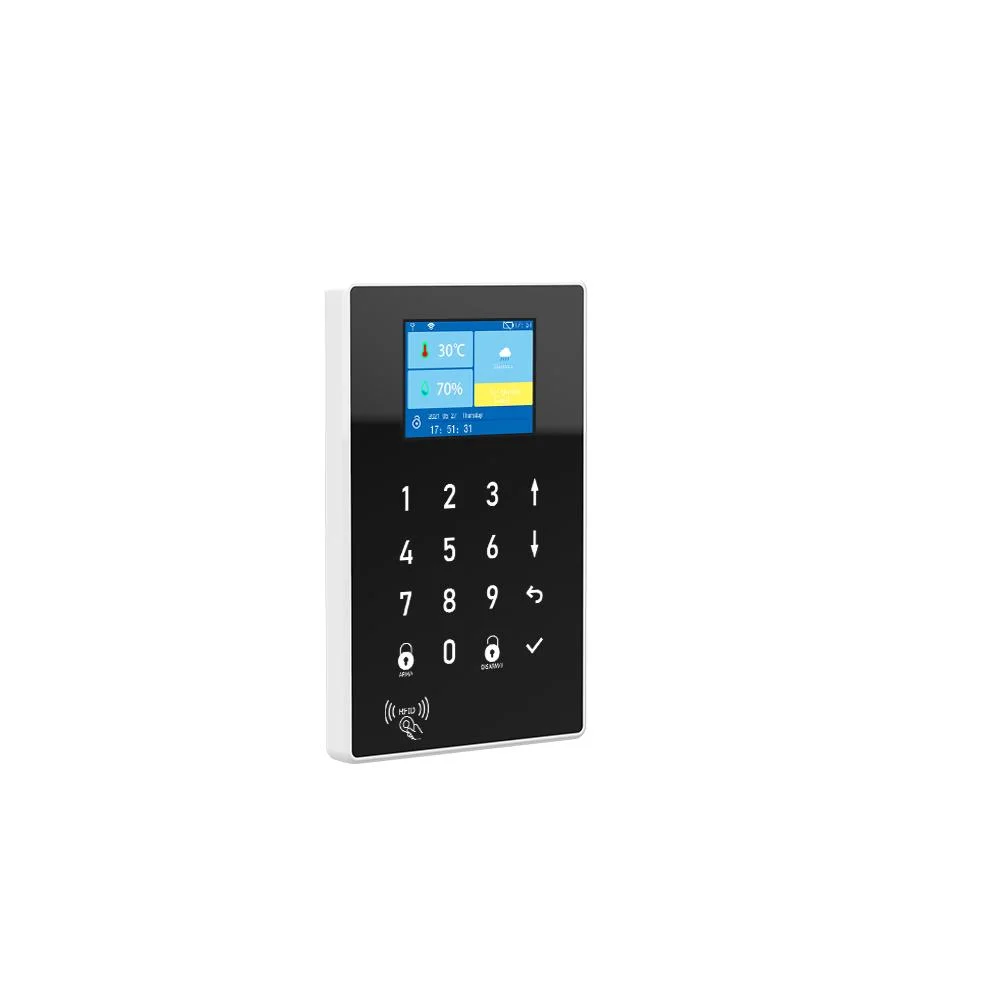
Power Supply: Micro USB 110/220VAC to 5V, 1000mA
Backup Battery: 3.7V, 500mAh Lithium Battery
Consumption: <150mA@normal
Siren Output: <500mA@high volume mode, <50mA@low volume mode Radio Frequency: 433Mhz RFID Reader: 125KHz/EM4100 Family (with a reading distance of 1~2cm)
Cellular: 850/900/1800/1900MHz (for 2G model)
Wi-Fi: IEEE802.11b/g/n Connectivity: wireless siren, up to 10 remote tags, up to 10 RFID tags and up to 100 sensors Contact ID: 1400-2300Hz DTMF(10 cps) 1400Hz Operation Temperature: -10~55ºC
Door/Window Sensor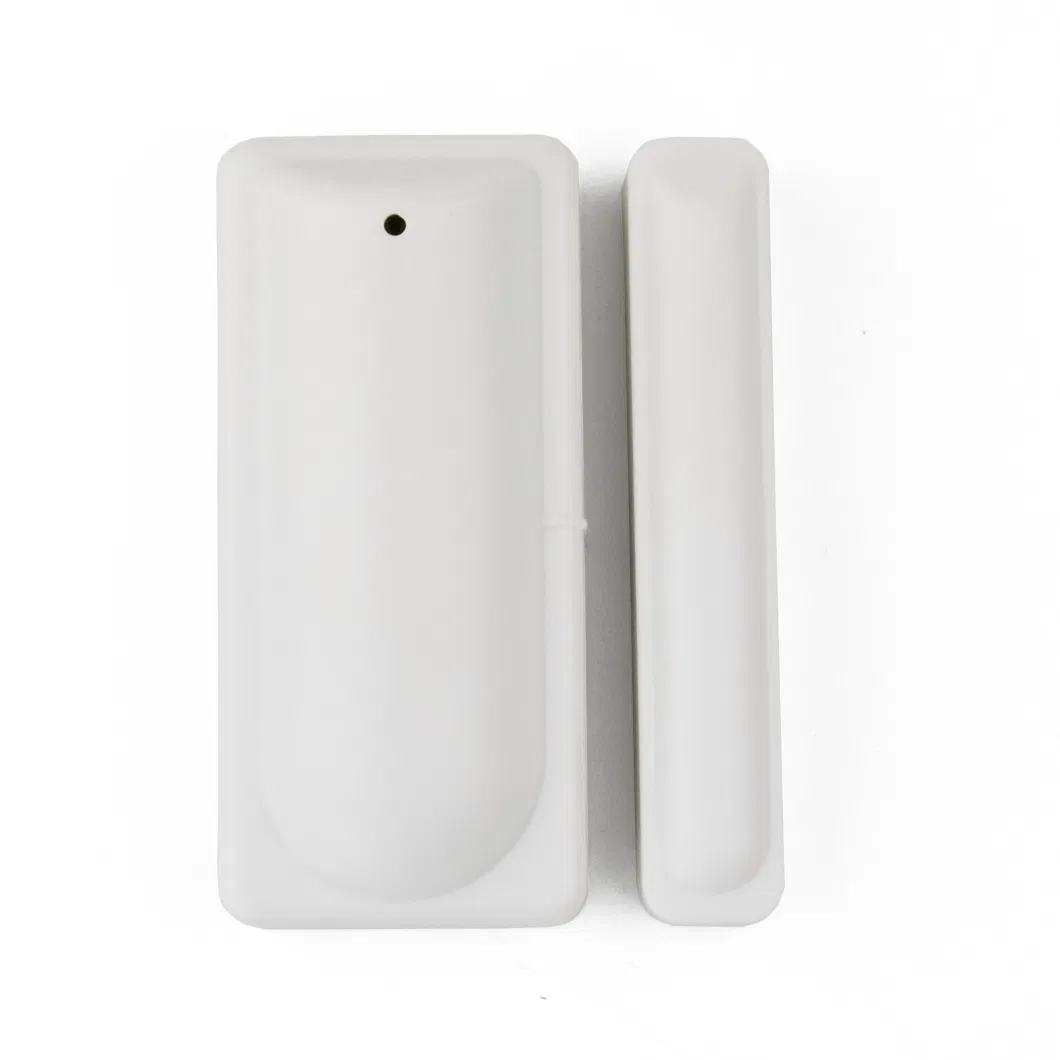
Power Supply: DC 3.6V (ER14250 Lithium Battery x1)
Consumption: <8uA@Standby, <15mA@Alarm
Transmitting Distance: <80m (Open Area/No Interference)
Radio Frequency: 433Mhz Operation Temperature: -10~55ºC
PIR Motion Sensor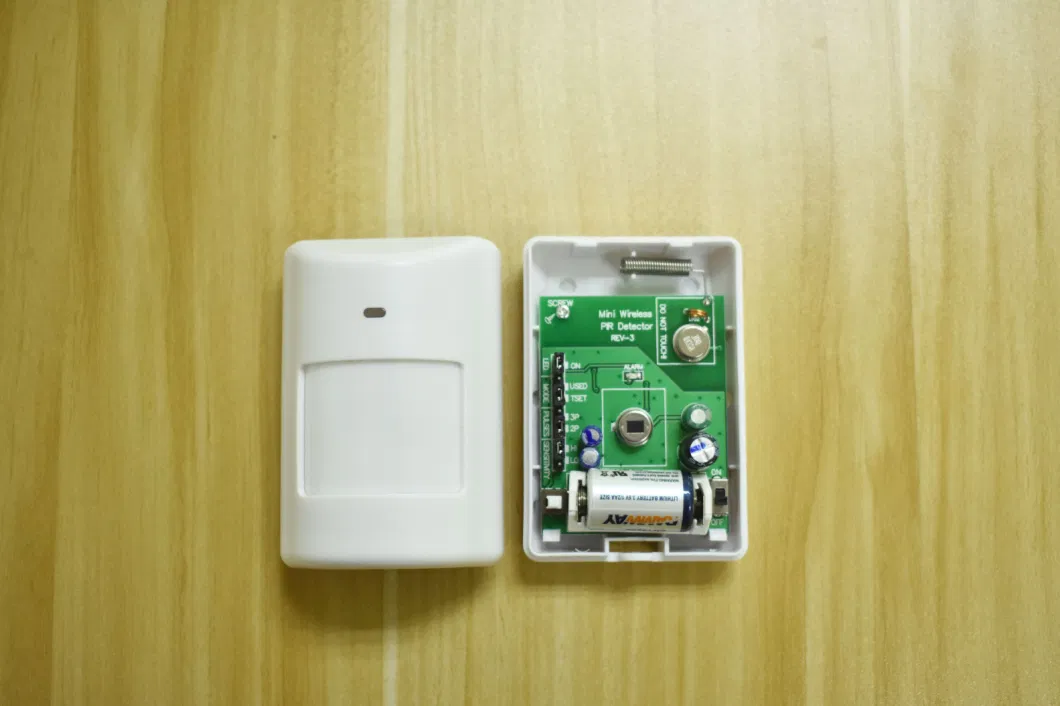
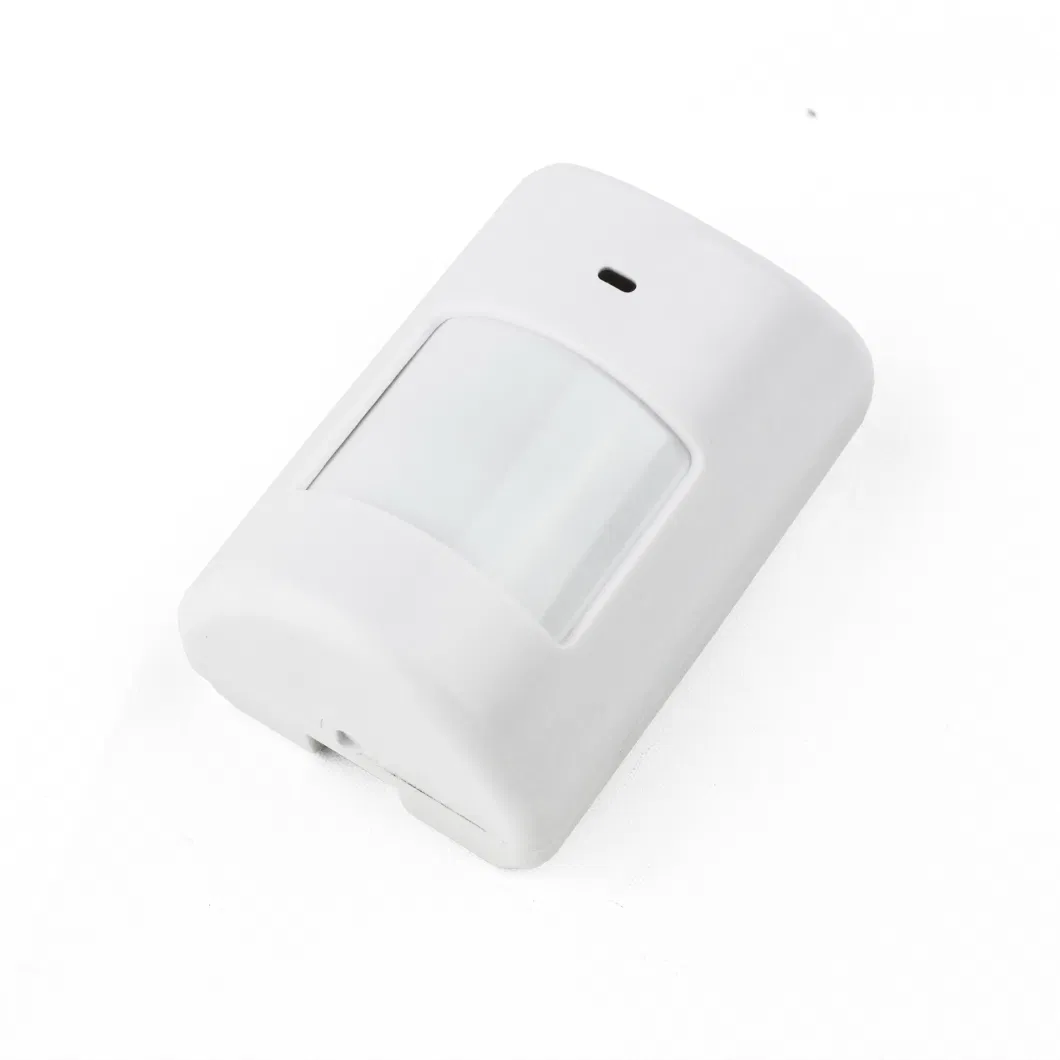
Power Supply: 3.6V Lithium Battery x1
Consumption: <15uA@Standby, <25mA@Alarm
Motion Distance: <12meters Motion Range: 110° Transmitting Distance: <80m (Open Area and No Interference)
Radio Frequency: 433Mhz Operation Temperature: -10~55ºC
Remote
Power Supply: DC 3.6V (ER14250 Lithium Battery x1)
Consumption: <5uA@Standby, <15mA@Alarm
Transmitting Distance: <80m (Open Area and No Interference)
Radio Frequency: 433Mhz Operation Temperature: -10~55ºC
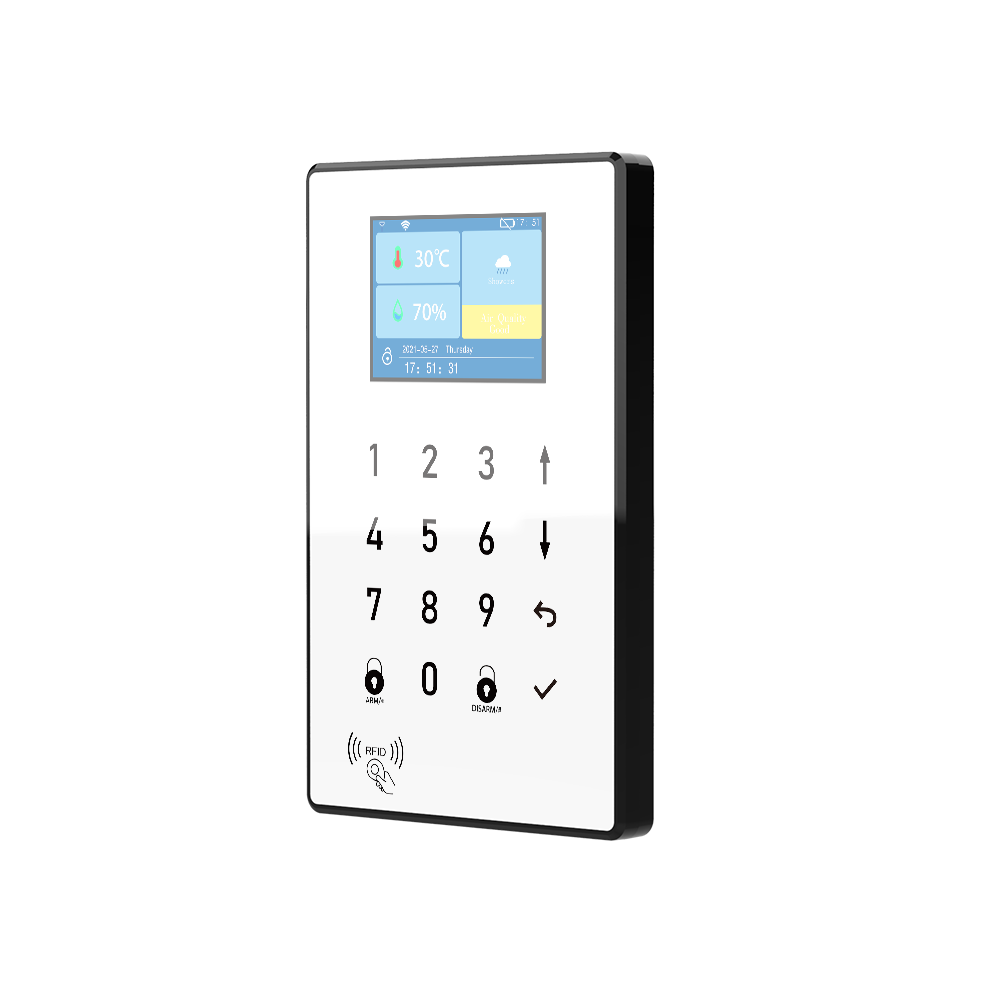
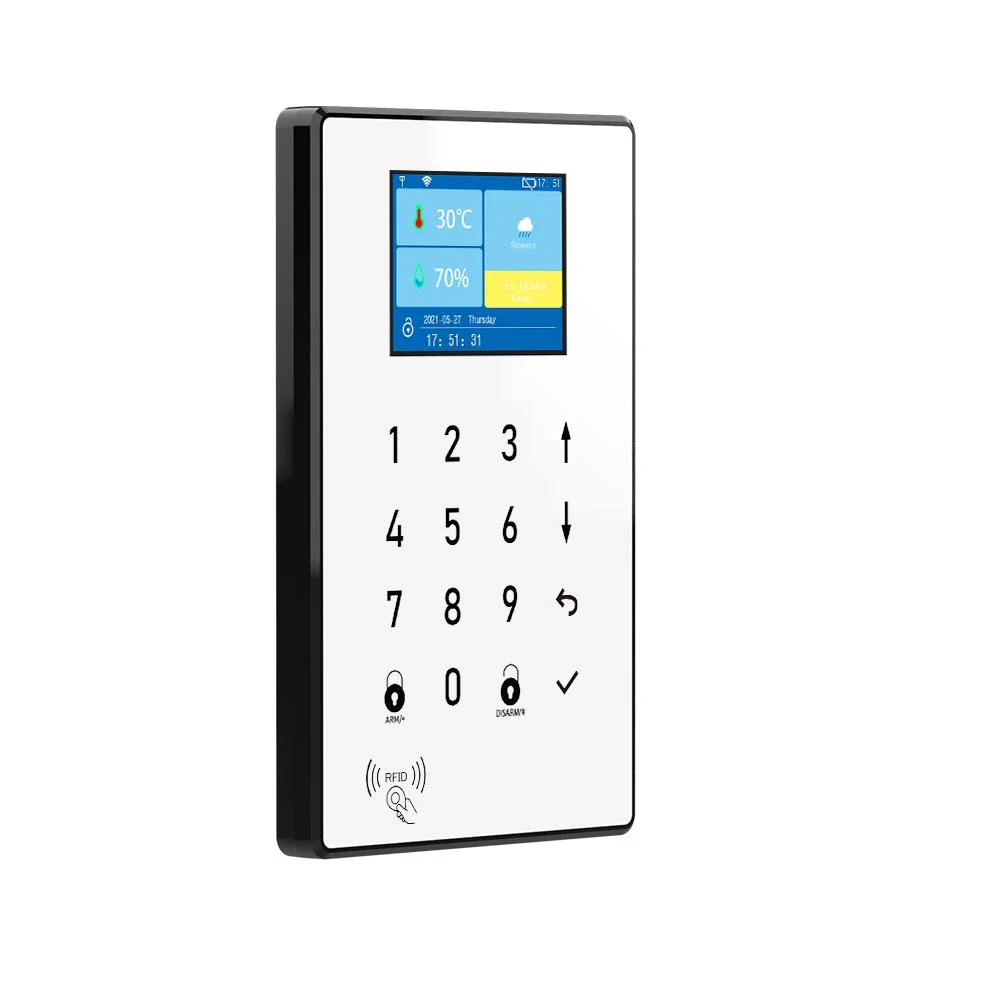
AT A GLANCE
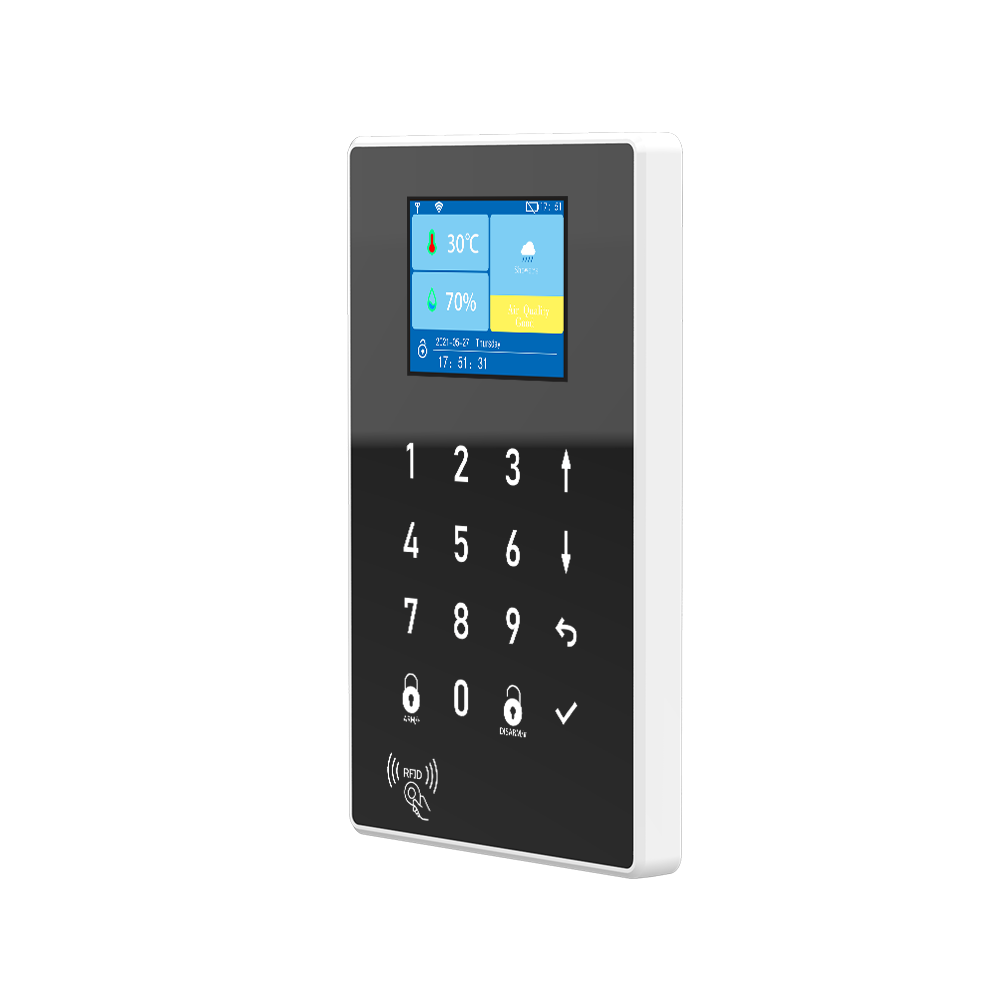
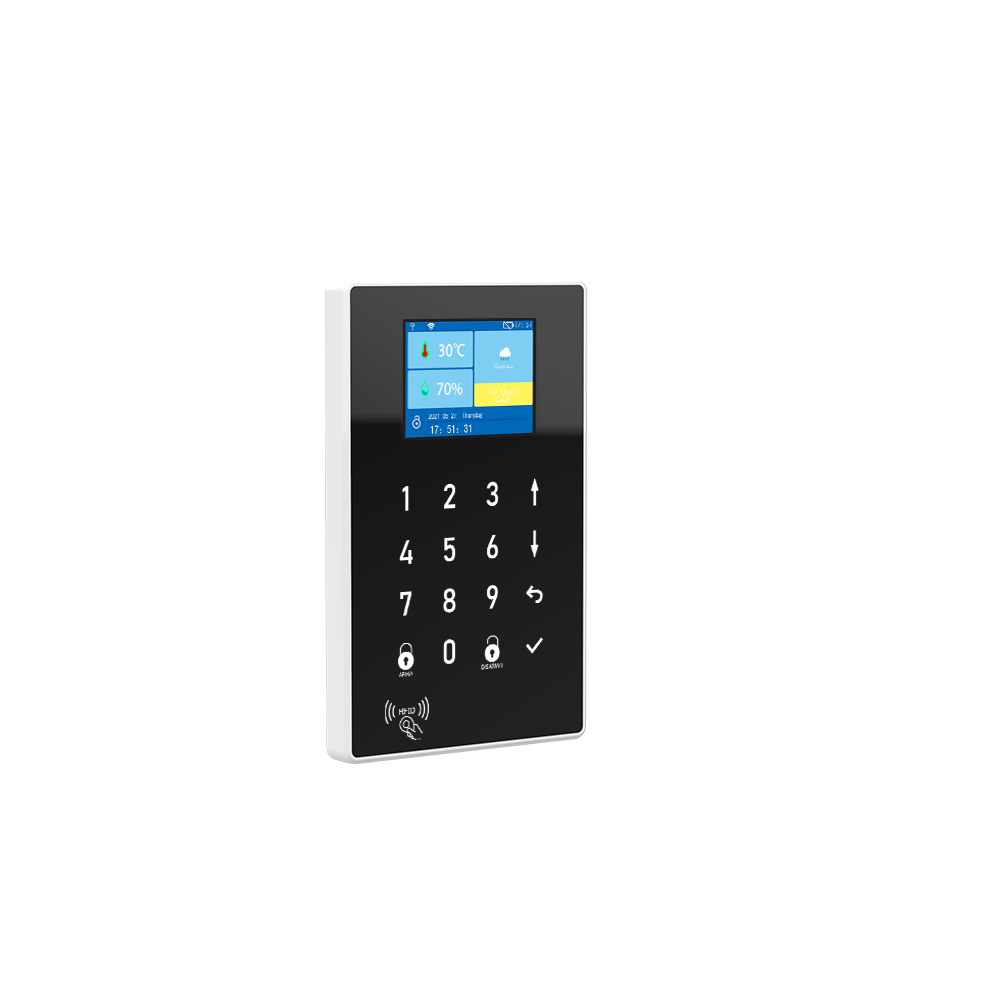
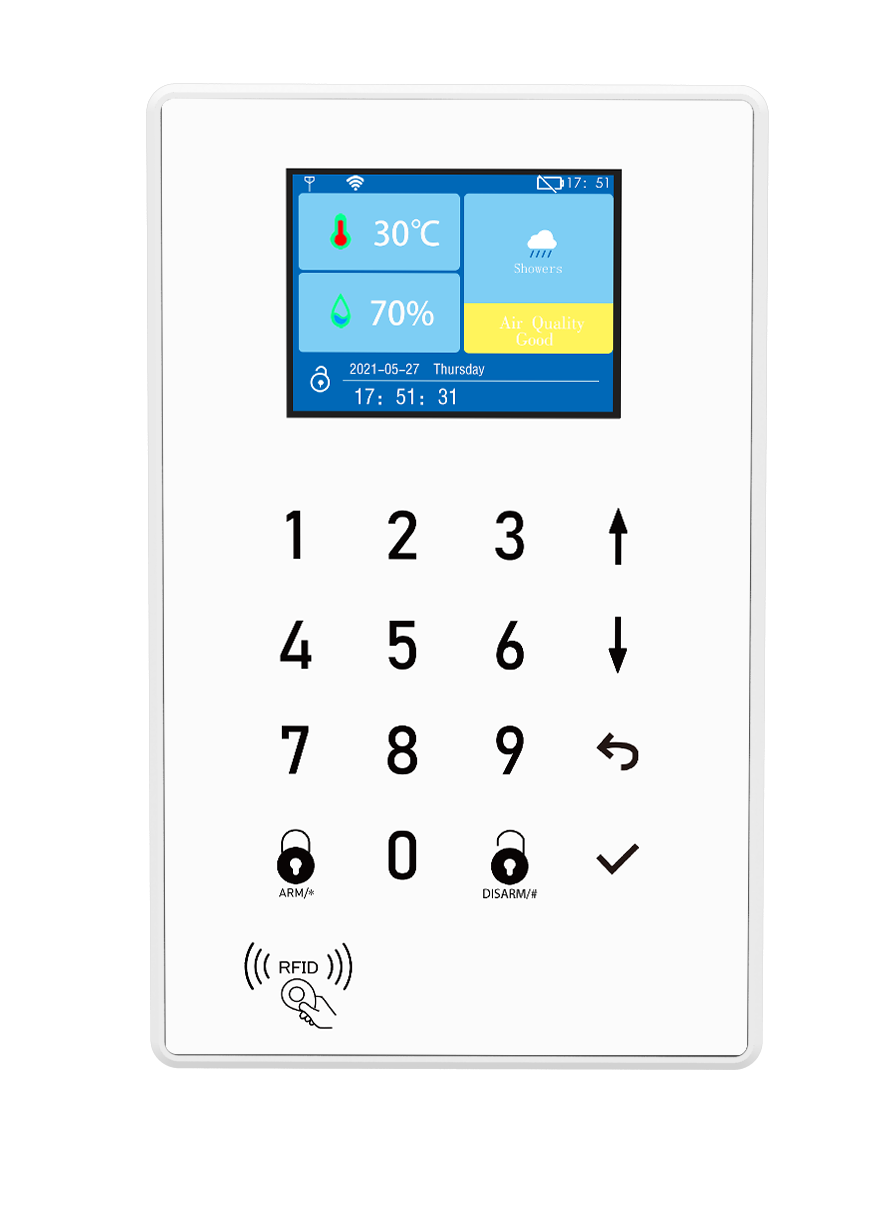
Alarm panel
1. Power button. When your panel is powered
by built-in backup battery, press and hold it until the screen says Bye to power your panel off. Press and hold it until Hello appears to
power your panel on. 2. Display window. Display weather, system
status, time, the alarm's information, menus, and more. 3. Temperature unit button.Tap to choose Fahrenheit or Celsius in home weather screen. 4. AM/PM 24H button.Tap to choose AM/PM or 24 Hour clock in home screen. 5. ARM / ARM STAY button.Tap to arm your security system and double tap to stay arm. 6. DISARM button.Tap to disarm your security
system. 7. MENU button.Tap to go to menu. 8. Digits Keypad. For entering passcode, setting, dialing and more. 9. RFID tag reader zone. Tap RFID tag here to
arm or disarm. 10. Speaker. For voice prompt and the alarm. 11. Wall Bracket. For installation. 12. Tamper switch. The tamper switch (lever underneath the bracket) will trigger an alarm
notification if an attempt is made to remove
the panel from its installed location. And the
alarm sounds. 13. Back lid. 14. Siren port. Plug in the siren cable here. 15. Power port (Micro USB). Plug in the power cable here. 16. EOLR connections. Socket for End of Line Resistor hardwired zones connections. 17. Micro SIM card slot. Install the SIM card
here.
Get Quote
NOTE: Please leave your email, our professional person will contact you asap!
Related products